In this section:
Upgrading from Previous Versions
Since the Classroom Capture program has been redesigned for 5.4, be advised of the following points regarding upgrading to the new Classroom Capture:
- Upgrading the ESS to 5.4 will NOT automatically upgrade the Classroom Capture interface on the classroom PC.
- Existing Classroom Capture devices will continue to work and will still capture scheduled recordings.
- The System Tray icon for Classroom Capture will still appear on the podium PC but clicking it will do nothing. It remains solely as a visible artifact from the old version. Academic Staff may question this.
- To use the new Classroom Capture interface, you must install Classroom Capture as if it was a fresh installation (instructions below). The installation will prompt you to confirm removal of the old version.
- Until the podium PC is upgraded, Academic Staff will have to use the Web UI for Automated or Basic Ad Hoc Captures from the classroom.
- Notification of future upgrades will appear as a notice in the bottom bar of the Classroom Capture window. Clicking on this notice launches the upgrade.
If you are upgrading from Classroom Capture version 5.3 or earlier, be sure to check the following items after installation and perform actions as necessary:
- Check to be sure the Classroom Capture device is still registered (using the MAC address of the device). If it is not, register it (instructions below).
- Assign the device to a room, and re-license if necessary. These assignments should have been retained on upgrade, but check to be sure.
- Configure the devices for capture, if necessary.
Download the Installer
Download the Classroom Capture (Windows) installer from the EchoSystem Server (ESS). A wizard guides you through installation.
- Log in to the ESS.
- Navigate to the Downloads tab, shown in the below figure.
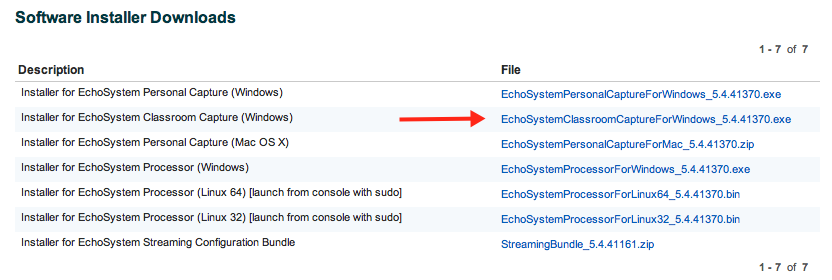
- Download the installer by selecting the appropriate link, identified in the above figure. The installer must be run locally, so save the file to your computer.
Run the Installer
- Log into the PC as an Administrator.
- Locate the installer executable and double-click it. This starts the installation process.
- If you are upgrading from a previous version of Classroom Capture, you will receive a confirmation dialog box, shown below, requesting to uninstall the old version. Click yes to allow the wizard to uninstall the old version and continue with 5.4 installation.

- Follow the installation wizard.
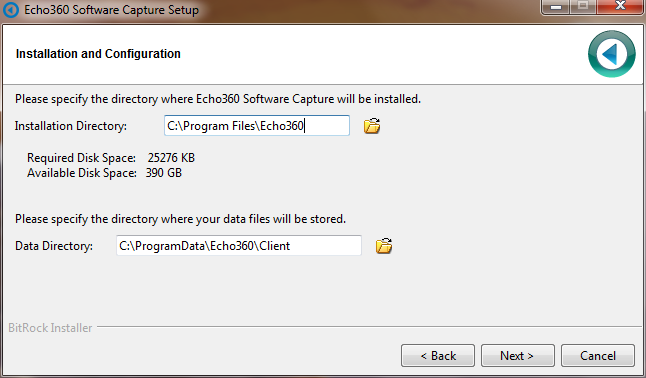
- Confirm or change the locations for installation and for capture files, as shown in the below figure, then click Next.
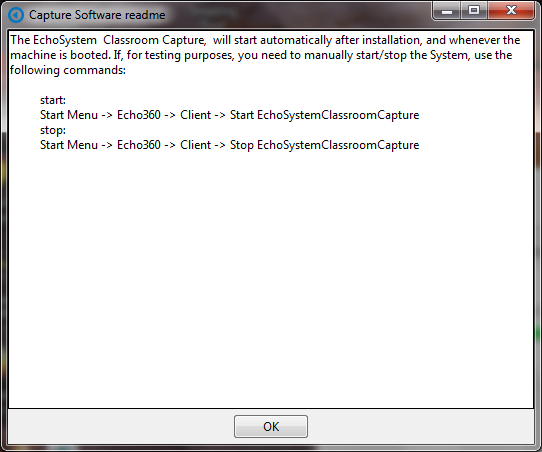
- Continue through the installation wizard. You will receive a dialog box, shown below, providing start/stop instructions for Classroom Capture. The program is automatically configured to start when Windows starts.
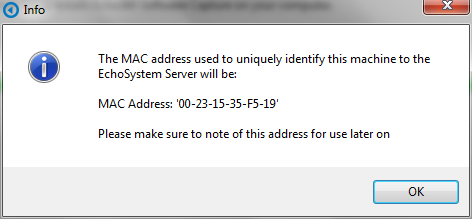
- Click OK. You then receive a dialog box, shown below, providing the MAC address of the computer. You will need to know the MAC address in order to register the device on the ESS.
- Continue through the installation wizard. When complete, click Finish to close the installer.
Troubleshooting Access Rights Issues During Installation
If you have access rights issues during installation, your System Administrator may need to change the permissions on the local Users group on the podium PC for the C:\Windows\temp directory. Typically the local Users group only has Read & Execute rights. The local Users group must have the following permissions for this directory:
- Modify
- Read & Execute
- List Folder Contents
- Read
- Write
Register the Classroom Capture Installation
Classroom Capture functions as a recording device, just like the capture appliances do. In order to use Classroom Capture as a recording device, you need to register the installation on the ESS. You will need to know the MAC address of each PC on which Classroom Capture is installed in order to register them with the ESS.
To register the Classroom Capture Device/Installation:
- In the ESS application, navigate to Configuration > Devices.
- Select the Unregistered tab. The Unregistered Devices screen opens, showing all of the unregistered devices.

- Highlight the Classroom Capture installation that matches the MAC address provided during installation.
- Click register. A pop-up dialog box appears.
- Select the Organization for the device from the drop-down list.
- Click Register.
- Select the Active tab to check that the device is now Active.
- Notice that the MAC address of the Classroom Capture installation is listed in the Summary column.
- Wait for the capture status and log upload status to change to Idle. This shows that the Classroom Capture device has been successfully registered.
Once registered, the Classroom Capture installation can be assigned to a room and used for either a scheduled or ad hoc capture.