Import Other Media for Academic Staff
In this section:
Overview
Although you probably use the EchoSystem primarily to record class lectures, you might also want to use it to preserve and distribute other materials.
If you are an Academic Staff member, as the Instructor for a section you might want to:
- Upload a video that students should view before discussing it at a class meeting
- Upload materials that expand on a particular lecture
- Upload materials not linked to any specific section, but share them with students
If you are a System Administrator, you might be asked to:
- Distribute a guest lecture given at the university by a distinguished alumnae
- Distribute an address given by the university president to colleagues
You can upload any of these materials to the EchoSystem then edit and manage them as you would an Echo.
EchoSystem calls these materials "other media" because they are not captured by the EchoSystem. Instead, you upload them yourself. The process of uploading an external file is called "media import".
You can:
- Upload multiple files to a specific section, though you must upload them one at a time.
- Upload files that are not associated with any class or any meeting
- Upload as many files as you like, though your System Administrator may limit the total amount of media you can upload to a section
- Edit files with the standard Echo editing tools
Tools and Formats Supported
Echo360 supports the file types listed below. These have been tested.
Echo360 will add support for additional tools and formats. If you use a format not listed here, you can attempt to ingest it. Other formats may work although they have not been tested.
If the format you use fails to process correctly, especially in the case of video files, it is likely that the video file format is not fully compatible with our encoding software. We suggest you attempt to re-encode the video into one of the supported formats (listed below) via a 3rd party video encoding software, and then use that as the source file for another media import attempt. Alternately you can enter a support request to suggest we add support for the format you are using.
Media Import Supports Stereo Audio Only
Media import does not support multi-channel audio.
Audio and Video / Audio and Screen
The following table lists the currently tested and supported combination audio and video file types.
Video File Format | Video Codec | Audio Codec |
|---|---|---|
AVI | CVID, TSCC | PCM |
FLV | VP6F | MP3 |
M4V | H.264 | AAC |
MP4 | H.264, AVC1 | AAC |
MOV | H.264, MPEG-4 (mp4v), DV | AAC, MPEG-4 (mp4a) |
WMV | WMV9 | WMA |
MOV | H.264, MPEG-4 | AAC |
MP4 | H.264, MPEG-4 | AAC |
M4V | H.264 | AAC |
M4V | H.264 | AAC |
AVI | DV | PCM |
MOV | H.264, CVID | AAC, PCM |
WMV | WMV9, VC1 | WMA9 |
MP4 | H.264 | AAC |
WMV | WMV2 | WMA2 |
AVI | CVID | PCM |
Audio Only
The following table lists the currently tested and supported audio only file types.
>Audio File Format | Audio Codec |
|---|---|
MP3 | MP3 |
WMA | WMA2 |
Choose and Upload Media
- Log in to the EchoSystem.
- Navigate to Echoes > Media Import. The Media Import screen appears, containing the necessary fields for import.
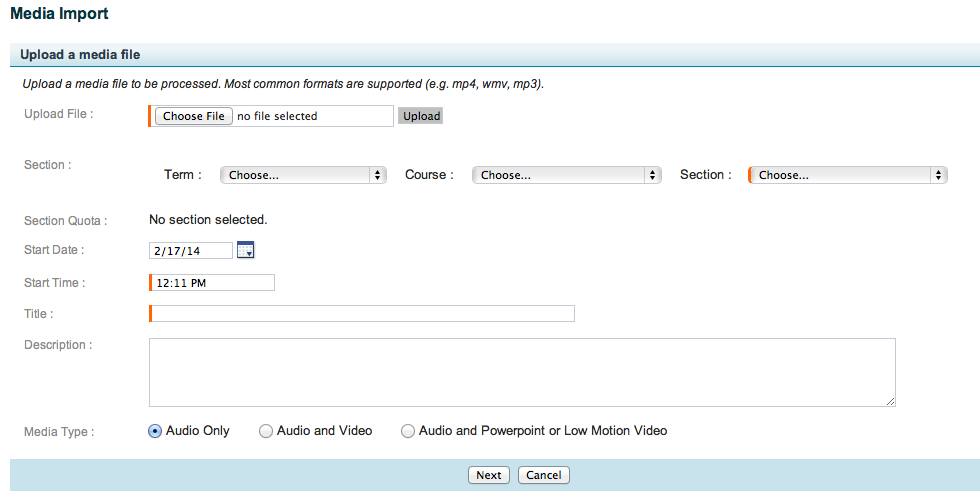
- Click Choose File to select the file you want to import.
- Click Upload to upload the file to the ESS. The upload process also verifies the media file as valid for use. Note that you will not see any upload status, and large files may take a long time. The URL address bar of the browser may indicate that the page is loading, and this may be your only indication of file upload progress.
- Once the upload is complete, the Media Import page refreshes to show the verified items, and now includes a Delete Uploaded File button, to use if there is a problem. The figure below shows the updated page.
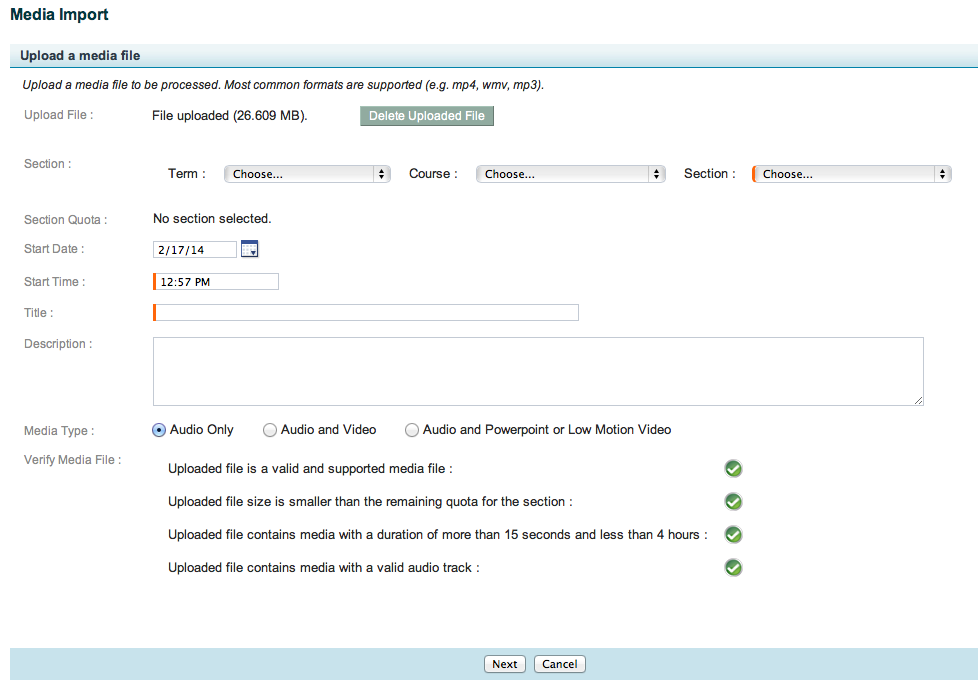
Use the drop-down lists to select the Term, Course, and Section to which you want to publish the uploaded item.
- The Section Quota field shows the amount of space used and the total amount available for media imports, if a quota is configured for the section.
Start Date and Start Time can be used to identify a particular date and time to which the uploaded media item applies, such as a particular class lecture or a guest lecture event. By default, these are set at the current date/time (the time and date that the item is uploaded).
Enter a Title that identifies the item for students.
Enter a Description for the item to advise students what the media import is and its purpose, or other relevant information to provide context for the item.
Select a Media Type. This selection determines the type of output that will be produced from the uploaded file. Your options include:
- Audio Only - Media files that contain only audio.
- Audio and Video - Media files containing visual motion, such as a web clip, files created using a standard video camera, web camera, or from a DVD source.
- Audio and Powerpoint or Low Motion Video - Media files containing a recording of a presentation made on a computer or other display device where readability is critical.
Once the file is uploaded and the fields are filled in, click Next.
- You may see a page where you can select the Product Group for the imported media. If you do not, skip to the next step.
- If applicable, select a Product Group from the drop-down list shown in the below figure. This determines the type of output product generated from the uploaded file. Note that depending on how the section is configured, you may have only one selection.

- Click Start Processing. The Processing Details page appears, shown in the below figure, listing the details of the file you imported.
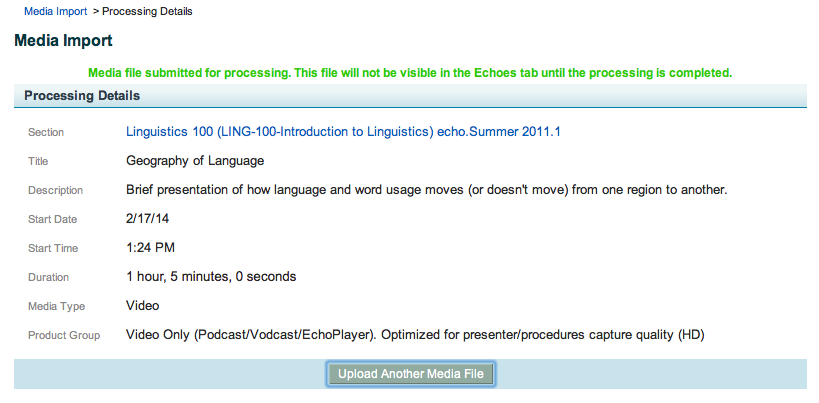
- Click Upload Another Media File to import another media file.
- After the material is uploaded you can edit it with the usual tools. If you are a System Administrator, you can also add closed captioning.