...
After configuring the EchoSystem Capture Appliance, you may want to further configure the EchoSystem Server (ESS), as described in Next Steps below.
| Wiki Markup |
|---|
| Warning |
The EchoSystem Capture Appliance is no longer supported as of March 31st, 2016. Echo360 has not sold or marketed the SD appliance since 2011 and has fully depleted its supply of replacements. There will be no more technical support, software patches, security updates or other development updates. EchoSystem releases after this date will not be tested for compatibility. For additional information, see these FAQs. |
| Anchor | ||||
|---|---|---|---|---|
|
...
- Log in to the ESS.
- Place the supplied USB drive in a USB port on the ESS.
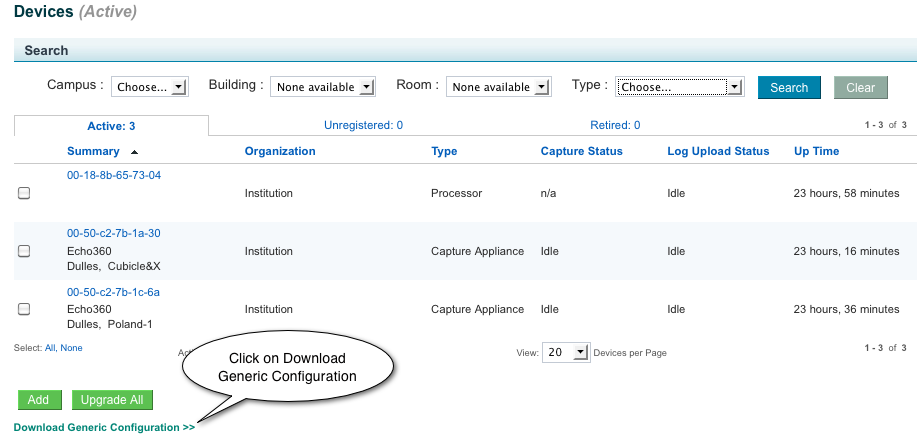
- Navigate to Configuration > Devices.
- Scroll to the bottom of the page.
- Click on Download Generic Configuration.
- Save the generic configuration file (device.xml) to the USB drive at the root level.
- Remove the USB drive from the ESS.
...
- Find the IP address of the appliance.
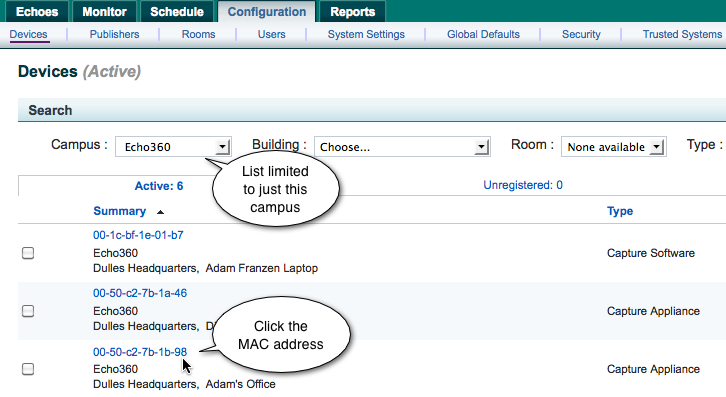
- Navigate to Configuration > Devices.
- Look for the MAC address. You can also use the Search drop-down lists to shorten the list to just those devices associated with a particular campus or room.
- Hover the mouse over the device.
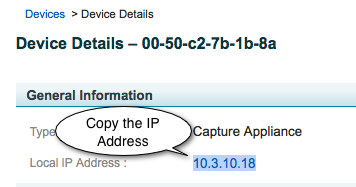
- Click the MAC address. The Device Details screen opens.
- In the Device Details screen, copy the Local IP Address.
- Log in to the appliance.
- Open a new browser or tab.
- Type https://<IP address>:8443. For example, you might type: https://10.3.10.18:8443 .
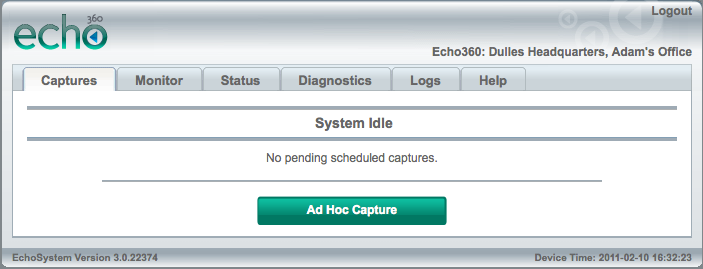
- Enter your user name and password when prompted. The screenshots below show the interface for a System Administrator. Other users see different interfaces.
- You should see the Ad Hoc capture start screen. This shows you have logged in to the EchoSystem Capture Appliance.
Monitor the Capture Appliance
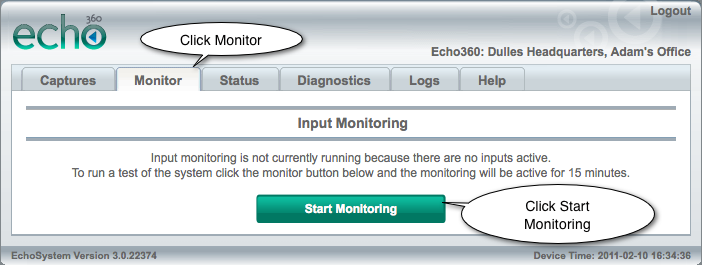
- In the Ad Hoc capture start screen, click Monitor.
- Click Start Monitoring.
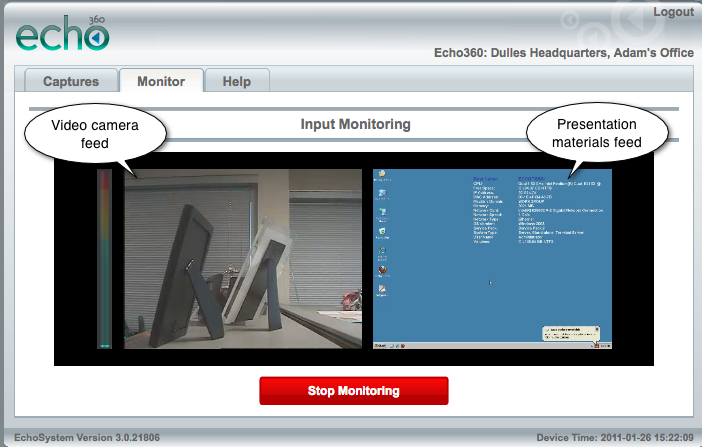
- In the monitoring screen that appears, check that you see images for the feeds you have established.
Next Steps
The EchoSystem Capture Appliance is ready to capture presentations.
...
