...
- Display the Organization Details page for either the parent or child organization.
- Navigate to Configuration > Organizations.
- Select the organization.
- Configure EchoCenter settings. These settings control many aspects of the appearance of the EchoCenter page.
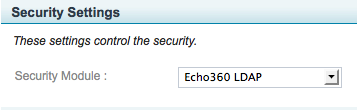
- Implement either standard or Collaboration Service EchoCenter pages by configuring the Security Module setting in the Security Settings group, as shown in the figure below.
- To implement standard EchoCenter pages, select Allow All.
- To implement Collaboration Service EchoCenter pages, select either LDAP or seamless login. See Security.
- Optionally, add a logo. The logo that appears on the EchoCenter page is specified in the Player Logo Image setting in the Branding group.
- Click Save to close the Organization Details page.
- After you complete this configuration, EchoCenter pages will appear automatically for each section.
- You, the System or Organization Administrator, will see the URL for each EchoCenter page on the Section Details page, as shown in the following figure:

- These URLs are different from the URLs for individual Echoes, which appear on the Echo Details pages.

- You, the System or Organization Administrator, will see the URL for each EchoCenter page on the Section Details page, as shown in the following figure:
- Deploy the URLs to students and faculty using any of these methods:
- If you use Blackboard Learn as a publisher and have enabled EchoCenter publishing, URLs appear on the Blackboard pages.
- If you use Moodle and a publisher and have enabled EchoCenter publishing, URLs appear on the Moodle pages.
- If you use another publisher, you can enable EchoCenter pages by manually copy pasting or embedding URLs on the EchoCenter pages.
- If you send notifications via e-mail, continue to use that method. The EchoCenter page links are included in the emails.
...