Manage Device Configurations
In this section:
Overview
Device configurations allow you to fine-tune the input combinations (audio/video/display) a device accepts and the quality of the input the device captures. After you establish your preferred device configurations, specify them when you add or edit the individual device.
You could create a few different configurations and apply them to different devices. You might, for example, create a device configuration that captures audio, video, and VGA at the highest qualities possible, then apply it to the EchoSystem SafeCapture HD in the premier lecture hall. Another device configuration could apply to the Classroom Capture device in a classroom primarily used for seminars and discussions.
Best Practice: Edit Rarely
After you establish a device configuration, edit it only when absolutely necessary. If you are not satisfied with the capture quality, optimize the equipment in the venue first. Adjust the camera, the audio device, or the lighting first, review some Echoes, then adjust again. The environment in the venue affects the capture quality. If one Instructor turns on every light, the Echo may look washed out. If another Instructor turns off every light, the Echo may look dark. Adjusting the device configuration would not solve issues caused by a changing venue environment.
Add a Device Configuration
- Navigate to Configuration > Device Configurations.
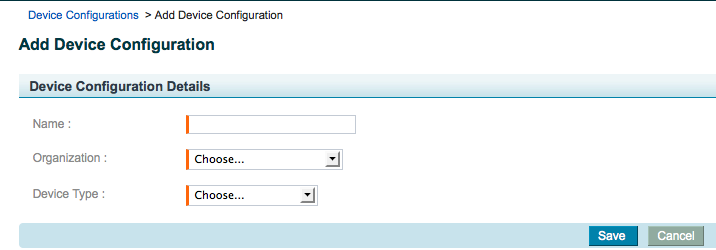
- Click Add. The Add Device Configuration page appears.
- Enter a name for the device configuration.
- Select the organization that will own the device configuration.
- Select a device type from the list.
- Click Save. Input configurations specific to the device appear.
- Configure the input combinations. See Edit the Input Configuration.
Edit the Input Configuration
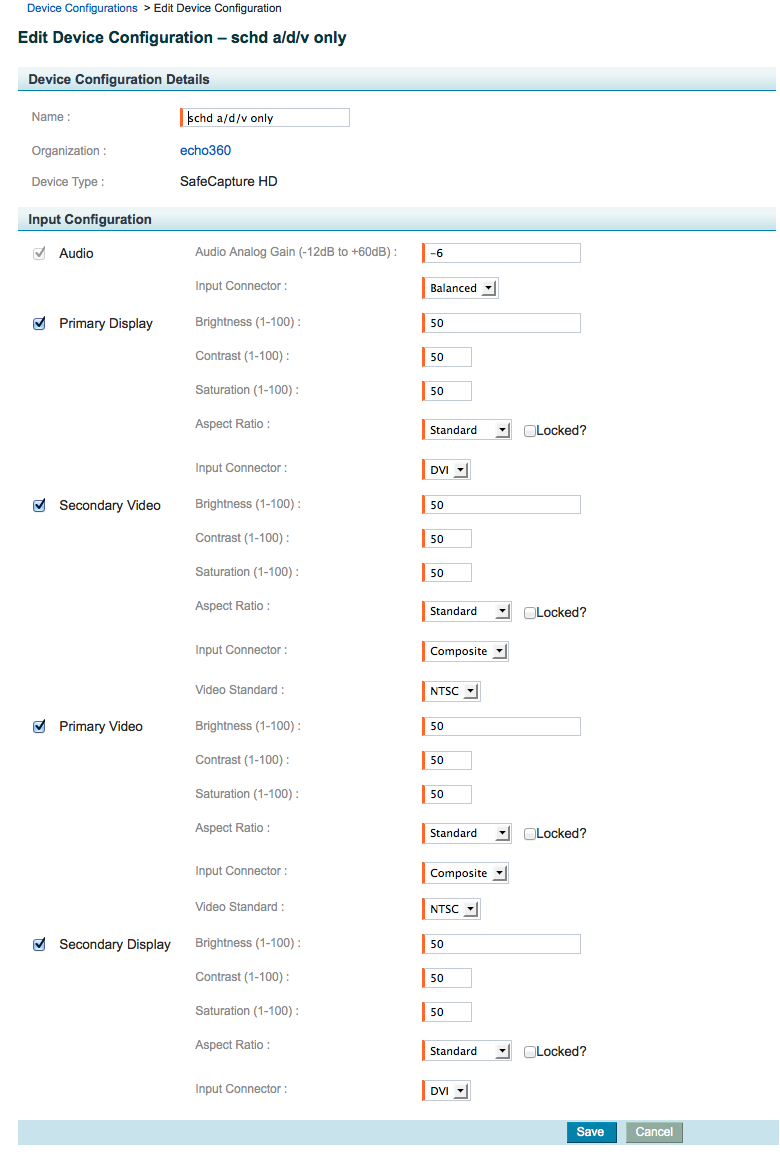
- Display the device details page. If you just added the device, the input configuration fields appear automatically at the bottom of the Add Device Configuration page (shown below). If you are editing an existing device, follow these steps:
- Navigate to Configuration > Device Configurations.
- Hover over the device name and click edit. The Edit Device Configuration page appears.
- Review the input configurations, which vary by device. This example shows the EchoSystem SafeCapture HD device, so you can configure Audio, Primary Display, Secondary Display, Primary Video, and Secondary Video.
- To specify only the input combinations you need for a particular device, select or deselect the input check boxes.
- Different inputs have different parameters.
- When adjusting gain, see the considerations on adjusting gain below.
- If you adjust the display configuration, see the considerations on using widescreen aspect ratio before specifying the widescreen aspect ratio.
- Click Save.
One-Touch Product Group Configuration [Echo360 PRO]
Please be aware that when adding or editing a Device Configuration for the Echo360 PRO, you will need to configure the One-Touch Product Group. The One-Touch Product Group is the input configuration used by default whenever a user presses the Record button on the front of the Echo360 PRO. This configuration should be set in order to make full use of the Record button.
When Adjusting Gain on the Audio Input
Best Practice: Adjust Gain on the Other Equipment First
Before you adjust the gain on a capture appliance, adjust the gain on all of the other sound equipment in the venue. When the sound quality of other equipment is stable, adjust the gain on the capture appliance. This way, the sound quality you hear when you adjust the capture appliance is sure to be the sound quality you hear on recordings.
- Play a pink noise source.
- Adjust the gain until all of the LEDs on the front panel are green. You should not see any yellow or red LEDs.
Pink noise, which sounds like static between FM channels, has a very low crest ratio and low dynamic range. The sound has a fairly constant power level, so the overall power level is higher than normal speech. This should get you a good starting point for further fine-tuning of audio.
Connector Type | Level | Range |
|---|---|---|
RCA Audio Connector | Consumer | (-10dBv / 0.316Vrms / 0.447Vpk) |
Bare Wire Audio Connector | Professional | (+4dBu / 1.228Vrms / 1.737Vpk) |
When Using the Widescreen Aspect Ratio on the Display Input
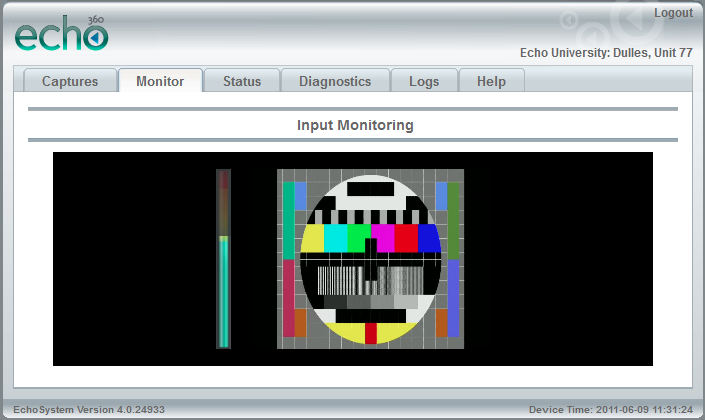
If you are configuring the SafeCapture HD, you can specify that the device capture in widescreen. If you do this, all devices with the configuration will capture in widescreen. This may result in Echoes with black bands on either side of the display area ("curtains"). This figure below shows a test pattern with curtains:
The curtaining effect occurs in this situation:
- An Instructor uses Ad Hoc capture
- The Instructor displays a presentation from his own laptop
- The laptop is set to a standard aspect ratio
Once the lecture is captured, the "curtains" cannot be removed, even if the Echo is reprocessed.
Echo360 recommends that you:
- Avoid specifying the widescreen aspect ratio in a device configuration.
- Specify the widescreen aspect ratio on an individual device, in a specific venue (like a classroom), as appropriate.
- Make sure that Instructors using their own laptops in the venue reset the aspect ratio on their laptops. You may want to post instructions in the room.
- Monitor Ad Hoc captures in venues with the widescreen aspect ratio. If you see a "curtained" display, you will need to reset the aspect ratio on the display device.
Delete a Device Configuration
You cannot delete a device configuration that is assigned to a device.
- Navigate to Configuration > Device Configurations.
- Hover over the device configuration you want to delete and click delete. A confirmation message appears.
- Click Yes. The Product Groups page appears with a delete confirmation message at the top.


