Install Personal Capture for Windows
- Hannah Petty
In this section:
Overview
Personal Capture for Windows is supported on the following operating systems:
- Windows 7
- Windows 8.1
You will also want to refer to the Personal Capture For Windows page for the following information:
- Recommended Hardware and Software to ensure your computer has sufficient resources to run the program properly.
- Supported Web Cameras for Personal Capture to determine what cameras you can use for your recordings.
Upgrading from Previous Versions
For both this and all future upgrades, a notice appears in the bottom bar of the program letting you know an update is available. Click on the bar to launch the update.
Download the Installer
Download the Personal Capture installer from the ESS web interface. If you have questions about accessing the ESS, see your ESS System Administrator.
- Log in to the ESS.
- Navigate to the Downloads tab.
Download the installer by selecting the appropriate link, identified in the below figure. The installer must be run locally, so save the file to your computer.
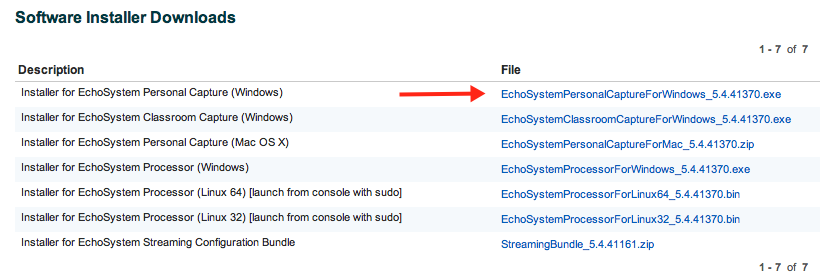
Alternate method: Get the installer directly from your System Administrator and save it to your local machine. In this case, the Administrator downloads the file from the ESS and provides it directly to you.
Use Local Directories for Installation and Capture Storage Directories
For the installation instructions below, note that the Personal Capture installation and data directories must be on the local drive; they cannot be located on a network, remote (mapped), or USB thumb drive.
Install the Program
When using PCAP for Windows, be sure that Windows Display Scaling is set to the default of 100% (see Control Panel > Display settings). Windows Display scaling, when enabled, can cause distortion and pixelization of the visual portion of PCAP captures. Refer to the attached image of the Control Panel > Display dialog box if necessary.
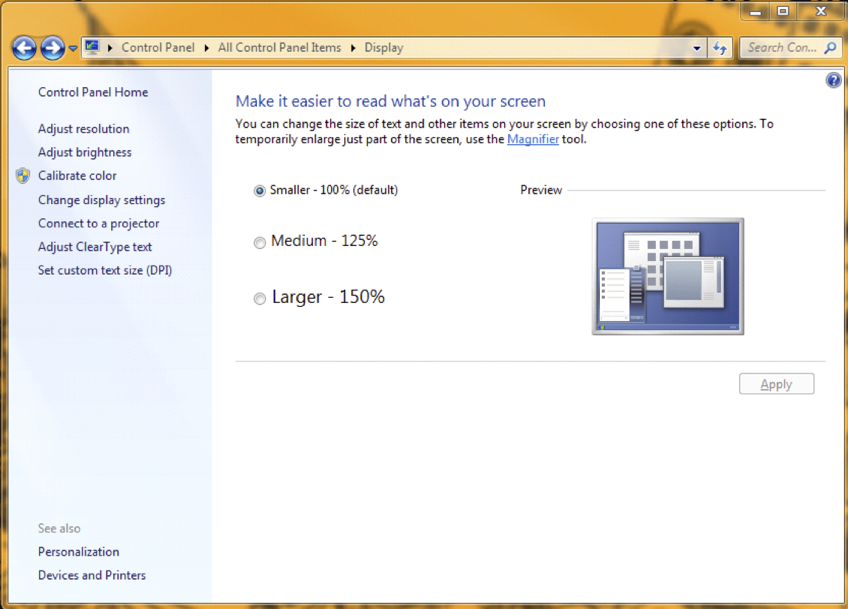
Personal Capture requires Microsoft .NET Framework version 3.5 or higher. According to the following article from Microsoft, newer versions of .NET are backwards compatible: http://msdn.microsoft.com/en-us/library/ff602939%28v=vs.110%29.aspx.
If an appropriate version of the .NET framework is not detected, the installer will attempt to download and install it for you. If it cannot be installed, the installation will stop.
- Locate the downloaded installer executable and double-click it. This starts the installation process.
- Follow the installation wizard.
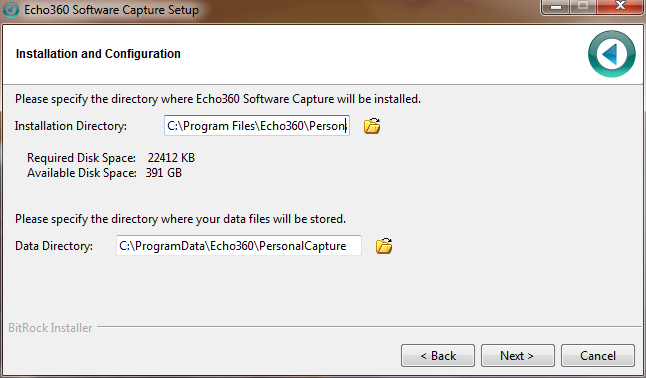
Confirm or change the locations for installation and for capture files, as shown in the below figure, then click Next.
- Continue through the installation wizard. When complete, click Finish to close the installer.
- If you installed the .NET Framework during installation or other registry changes were required, you may be prompted to restart the computer. Be sure to do so, as Personal Capture may fail until you restart the machine.
Please Note
Please note that even if you already have .NET 4.0 installed, you may still be required to install .NET 3.5.