Other Items on the EchoCenter Page
- Hannah Petty
In this section:
Overview
Other items included on the EchoCenter page are described on this page.
Live Webcast Button
If a live webcast is scheduled, you will, initially, see a banner announcing it. About 15 minutes before the scheduled start time of the live webcast, and during the webcast itself, you will see a button (as shown in the figure below) that allows you to join the webcast.

Upcoming Recording Banner
The next lecture scheduled for capture is listed at the top of the EchoCenter page, as shown in the figure below.

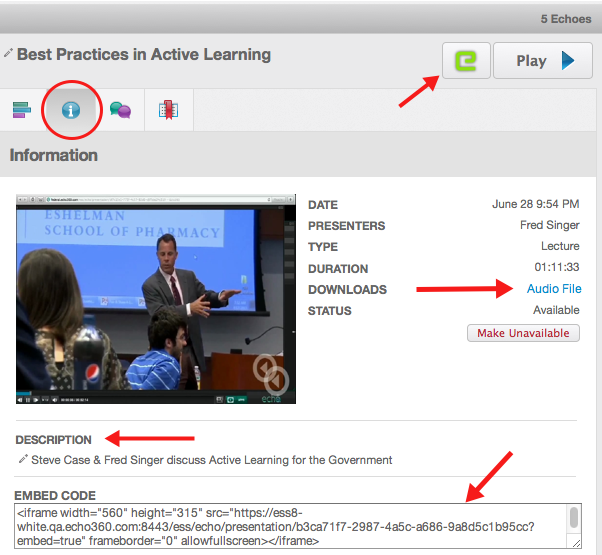
Information Tab
Click on the Information tab to:
- See identifying details (date, type, duration) about the selected Echo.
- Download Podcast, Vodcast, browser-based offline EchoPlayer versions of the Echo. The below figure shows an Audio File available for download. If the section is configured to not provide downloads, this field shows "Disabled".
- See a description of the Echo if you entered one (see Improve Learning - Add Descriptions for Each Echo).
- Copy the "Embed Code" for the echo. You can copy and paste this code into an LMS page for the section to embed the Echo there or in a 3rd party website such as a staff member's course page.
Follow these steps:
- Select the Echo with the information you want to see.
- Click on the Information tab, circled in the below figure.
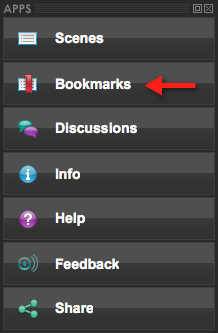
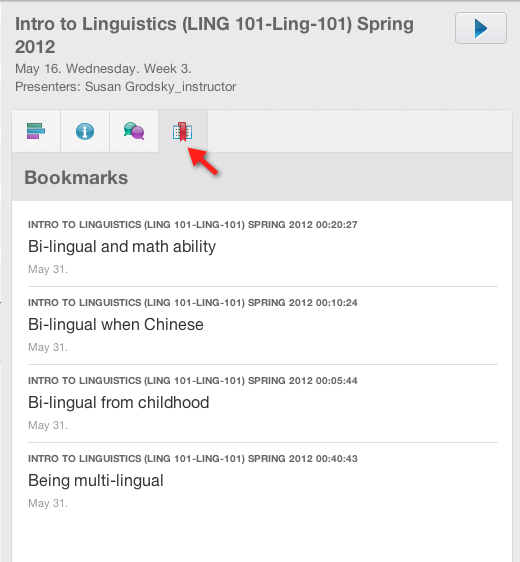
Bookmarks Tab
You or a student can add a bookmark to an Echo by clicking the Bookmarks button (shown below) while viewing the Echo in the EchoPlayer.
Bookmarks are important for students because they:
- Tag important parts of the Echo, allowing the student to quickly navigate to a certain point
- Can serve as brief course notes, offering an overview of what was covered in a particular lecture
Users only see their own bookmarks. You see the bookmarks you added. Each student sees the bookmarks he/she added.
Follow these steps:
- Select the Echo with the bookmarks you want to see.
- Click on the Bookmarks tab.
- Notice that the date below the bookmark is the date the bookmark was added to the Echo. It is not the date the Echo was captured.
- Click on the bookmark to open the Echo to that point.
Available/Other Control
As the school year progresses, the list of Echoes can become long and unwieldy. The Available/Other radio buttons help you organize the list of Echoes.
Click the Available button to see a list of Echoes that have been processed.
Click the Other button to see a list of:
- Echoes still being processed.
- Scheduled recordings.
- Echoes that are marked Not Available. See Manage Echoes for Academic Staff for instructions on marking an Echo as Not Available.
- Class meetings that were not captured as Echoes.
An example of the Other list is shown below.
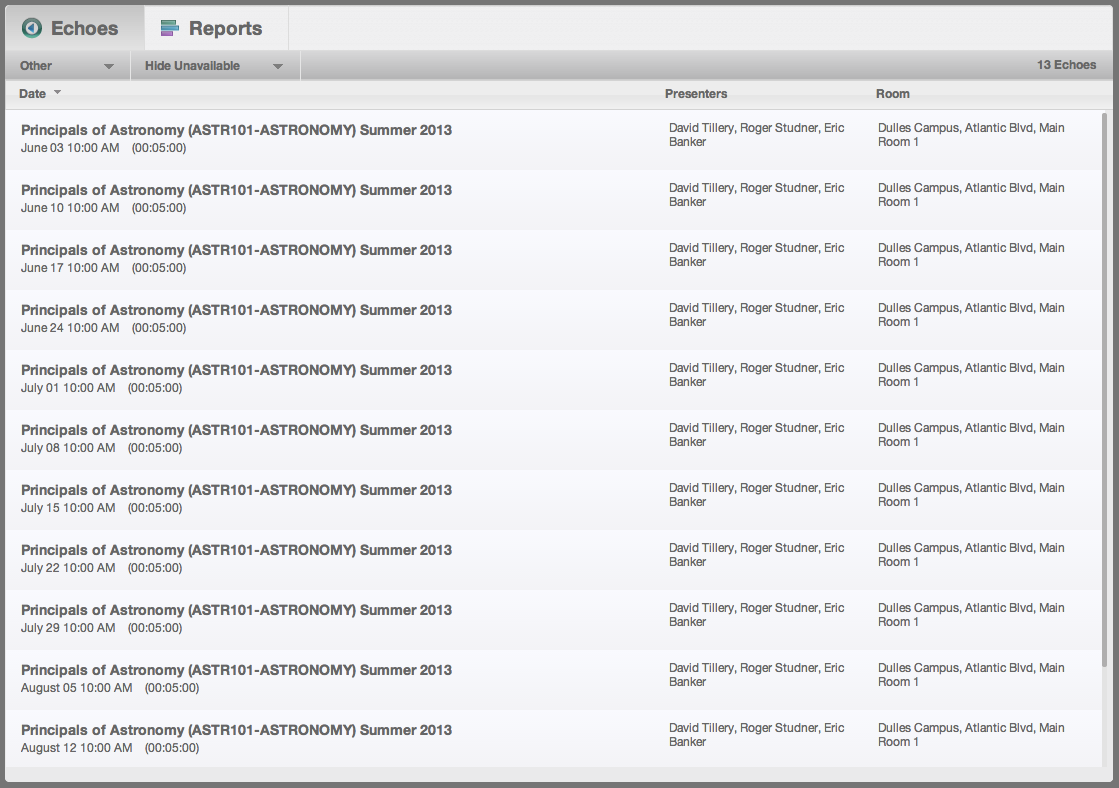
The Other list provides the following options and information:
- Available/Other drop-down list. Allows for toggling between the Available Echoes and Other Echoes
- Hide Unavailable/Show Unavailable drop-down list. This control is especially convenient for students, who can shorten the list by hiding unavailable Echoes. Echoes can be unavailable for a variety of reasons:
- You, the Instructor, may have marked an Echo as unavailable
- A class meeting may not have been captured because of a power outage or other malfunction
- The number of Echoes in the list.
- The status of any Echoes listed. This may identify that the Echo is being processed, or that the Class meeting was not captured. Most class meetings are captured and become available as Echoes, so it is helpful to see this case explicitly noted.
- The Presenters(s) and Room associated with any Echoes listed.
Preferences Button
The Preferences dialog box allows you to specify a variety of options that ensure you are using the EchoCenter to the fullest extent. In general, you can leave these options at the default values. However, you might want to change some options to customize the EchoCenter for your particular situation.
Follow these steps:
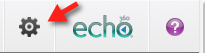
- Click the Preferences button.
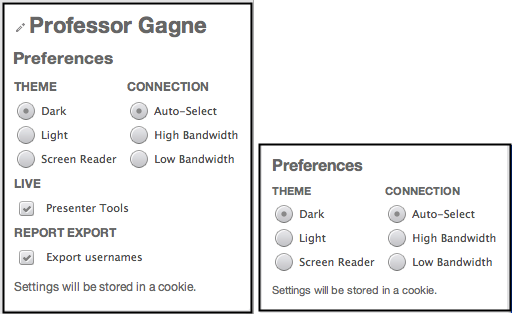
- You will see one of the Preferences dialog boxes shown below. The dialog box you see depends on the security configured for your section.
- If the section requires a login, you see the longer dialog box, including presenter and export options.
- If the section does not require a login ("anonymous access") you see the shorter dialog box.
- These instructions assume you see the longer dialog box. If you do not see it, consult with your System Administrator. Credentialed access (access that requires a login) allows you to use the Presenter tool and report export.
The display name is the name students see when you are chatting and asking questions in the EchoPlayer.
To change your display name, follow these steps:
Click anywhere on the display name ("Professor Gagne" in this example).
The display name becomes an editable field, as shown in the below figure.
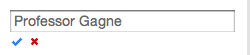
Edit the name.
Click the check mark to save the edited name. Click the X to cancel any changes made in the field.
Select your preferred Theme.
The Dark and Light themes control the background of the Echo
The Screen Reader theme is optimized for the visually-impaired.
Select your preferred connection speed. The connection speed that can be supported depends on the quality of your network. We recommend choosing Auto-Select (this is the default).
Theme and Connection affect the EchoPlayer not the EchoCenter
Selecting Theme and Connection options affect the appearance and performance of the EchoPlayer, and have no affect on the EchoCenter.
Check or uncheck the Presenter Tools check box. Checking the box gives you access to tools that are useful when doing a live webcast. See Live Webcasting for Academic Staff.
- Check or uncheck the Export usernames check box. We recommend that you leave this box checked (this is the default).
- This option may be useful if you will export engagement analytics to a spreadsheet (see Student Usage Reports - Are Students Engaged?).
- If you do so, the student name on the report will be the name EchoCenter uses. This is the student's first name and last name ("Carlos Garcia").
- However, you may want to compare the engagement analytics reports with information from other systems, such as a learning management system (BlackBoard, Moodle) or a grading report system. These systems may use different name formats for the same student. ("cgarcia" instead of "Carlos Garcia").
- When this box is checked, the exported engagement analytics report shows both name formats, allowing you to reconcile data from engagement analytics with data from other systems.
- Move your cursor away from the dialog box. The box disappears. Your changes have been saved.