About the front panel of the Echo360 PRO
- Hannah Petty
In this section:
Overview
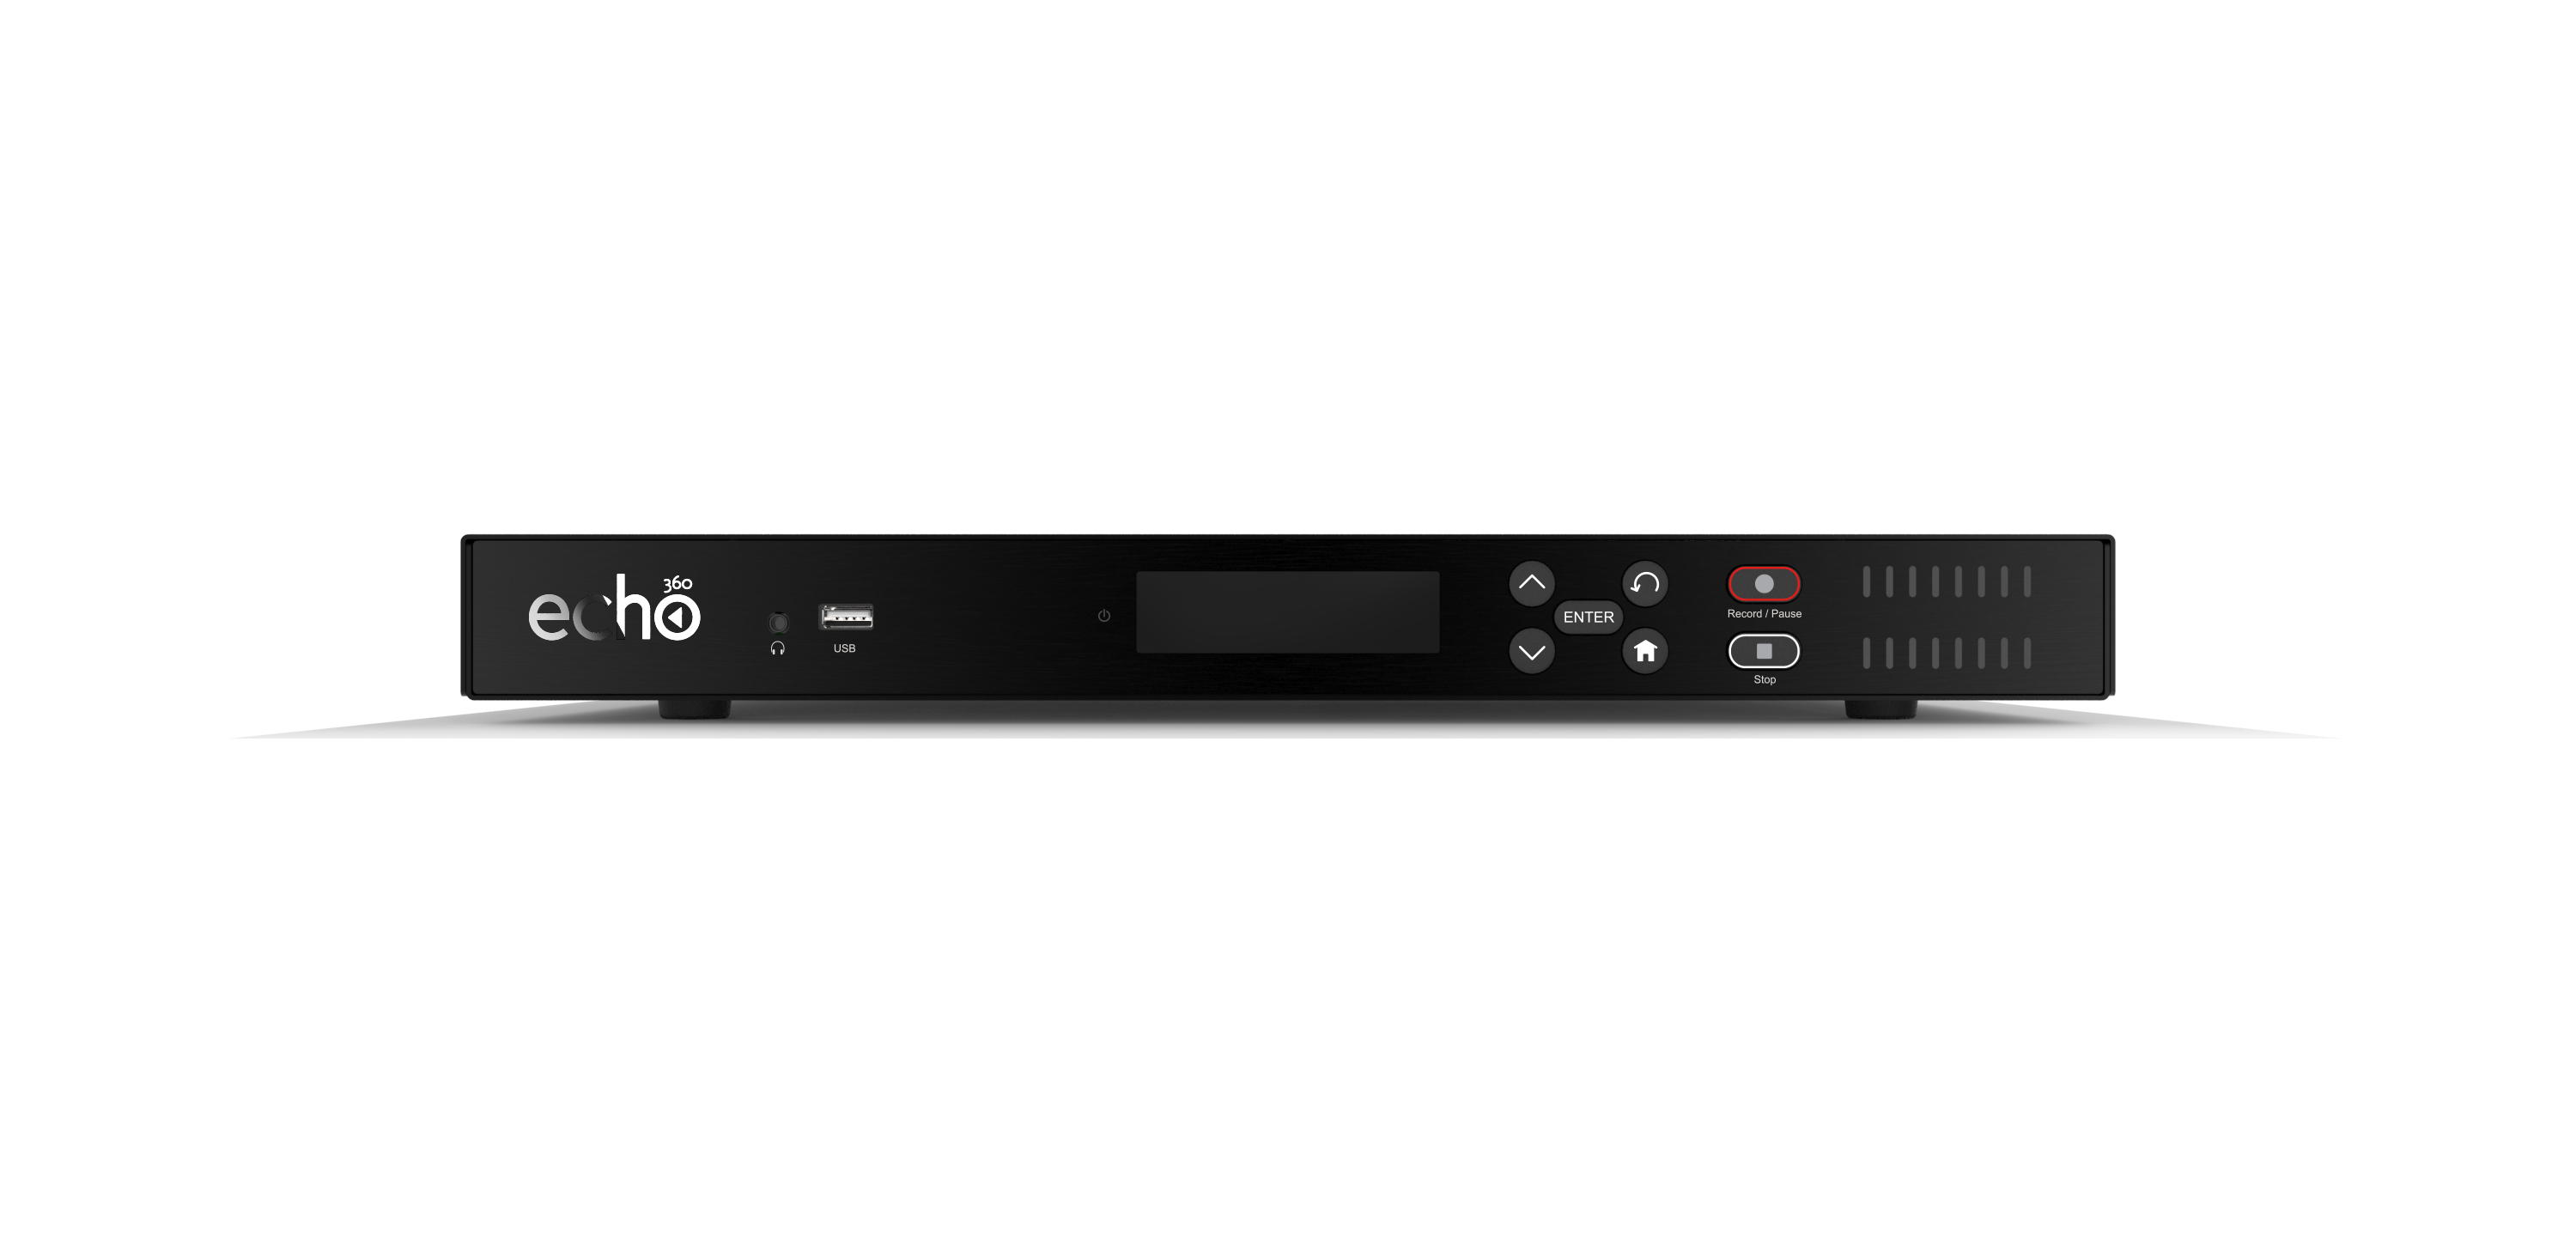
The front of the Echo360 PRO has a display panel as well as touch button controls, audio indicator lights (VU meter), a USB drive and a headphone jack (intended for monitoring audio levels and will always have the currently recording audio on it).
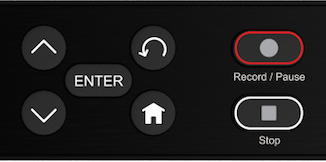
The Buttons
| Button | Description |
|---|---|
 | Up - Can be used to move up through the menu options as well as to move forward through a configurable field. Also used to scroll through alphanumeric input options (press enter to select the letter or number you'd like to alter and then use the up and down buttons to scroll through selection options, then press enter again to confirm your selection). |
 | Down - Can be used to move down through the menu options as well as to move backward through a configurable field. Also used to scroll through alphanumeric input options (press enter to select the letter or number you'd like to alter and then use the up and down buttons to scroll through selection options, then press enter again to confirm your selection). |
 | Enter - Used for selection and confirmation. |
 | Back - Used to return to the previous screen/menu. |
 | Home - Press at any time to return to the Home Menu. |
 | Record/Pause - Used for capture control. When the Record button is pressed on the front of the appliance to start an ad hoc capture, the appliance uses the product group that is set in the ESS and designated as the "One-Touch Product Group". For more information, please see One-Touch Product Group configuration and "What is the One-Touch Profile" in our FAQs section. LED Behavior: This button is backlit by a LED that behaves differently based on the current Recording State
|
 | Stop - Used for capture control. LED Behavior: This button is backlit by a LED that behaves differently based on the current Recording State
|
The Status Screen
The Status Screen will be displayed by default when the device is woken from a sleep state. Under most conditions, when the device is not in use (not recording, paused or publishing), the display will be turned off. As soon as a user presses a button (any button) the display will wake and the Status Screen will be shown.
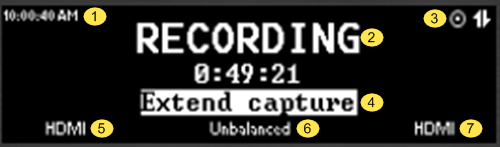
The Status Screen displays the following information:
| # | Section | Description |
| 1 | Date and Time | The current local time of the device, in HH:MM:SS AM/PM (i.e. 10:00:40 AM) |
| 2 | Recording State |
|
| 3 | Status bar |
|
| 4 | Capture Actions and Info. | This will show any pertinent actions that can be taken by a user depending on the current Recording State. When Idle, this will show the next upcoming capture (if applicable). When Recording, this will show actions that can be taken. |
| 5 | Channel 1 connection | What input the Channel 1 input is configured to use for the current or next scheduled capture. If the device is Idle and there are no upcoming scheduled captures, this section will display the word, "None". |
| 6 | Audio connection | What input the Audio input is configured to use for the current or next scheduled capture. If the device is Idle and there are no upcoming scheduled captures, this section will display the word, "None". |
| 7 | Channel 2 connection | What input the Channel 2 input is configured to use for the current or next scheduled capture. If the device is Idle and there are no upcoming scheduled captures, this section will display the word, "None". |
The Menus
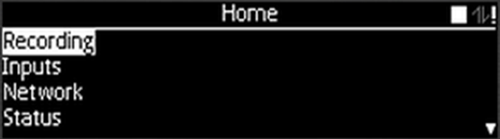
Home Menu
From the Status Screen, the user will be able to press the Home button to bring up the Home Menu. This Menu allows access to a number of different Action Menus using the navigation buttons. One can always navigate back to the Home Menu by either backing out of the selected menu or by using the Home button.
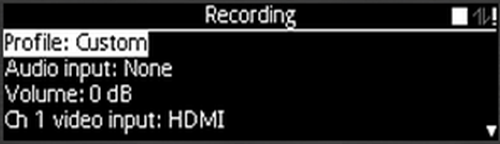
Recording Menu
The Recording Menu will display information regarding the capture profile and capture sources.
| Sub Menu | Description | Selectable / Read-Only | Options |
|---|---|---|---|
| Capture Profile | Allows selection of the desired capture profile for ad hoc captures, detailing which inputs will be captured. | Selectable | Profiles returned from the server (i.e. Audio Only, Audio / Display, Audio / Video, etc.) and will only appear once the device has been configured. Details:
|
| Audio Input Type | Allows selection of the desired audio input type for ad hoc capture. | Selectable | Balanced Input, Unbalanced Input, HDMI (Channel 1), HDMI (Channel 2), 3G-SDI (Channel 1), 3G-SDI (Channel 2) Please see note about HDMI Audio. |
| Audio Volume | Enables control of output volume level for audio out for ad hoc captures. | Selectable | Mute, Low, Medium, High |
| Channel 1 Input | Enables control over which graphical input connector will be recorded for Channel 1, for an ad hoc recording. | Selectable | 3G-SDI, HDMI, Composite, VGA |
| Channel 1 Quality | Allows selection of the desired quality output for the channel in question. | Selectable | High, Low |
| Channel 2 Input | Enables control over which graphical input connector will be recorded for Channel 2, for an ad hoc recording. | Selectable | 3G-SDI, HDMI, Composite, VGA Note: Shows 'Connected' or 'Not Connected' next to each connector |
| Channel 2 Quality | Allows selection of the desired quality output for the channel in question. | Selectable | High, Low |
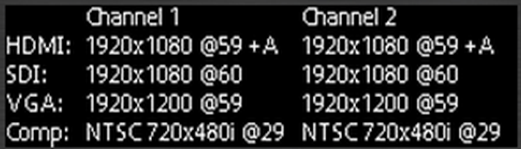
Inputs Menu
The Inputs Menu will display which connectors have valid connections (Channels 1 and 2).
| Sub Menu | Description | Selectable / Read-Only | Options |
|---|---|---|---|
| Channel 1 | Displays which connectors (HDMI, 3G-SDI, VGA, Composite) have valid connections. | Read-Only | HDMI (with or without Audio), 3G-SDI, VGA, Composite |
| Channel 2 | Displays which connectors (HDMI, 3G-SDI, VGA, Composite) have valid connections. | Read-Only | HDMI (with or without Audio), 3G-SDI, VGA, Composite |
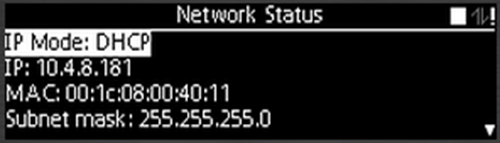
Network Menu
The Network Menu will display network connections and settings.
| Sub Menu | Description | Selectable / Read-Only | Options |
|---|---|---|---|
| IP Mode | Displays whether the device is connected via DHCP IP address or Static IP Address. | Read-Only | Displays Static or DHCP |
| IP Address | Displays IP address of appliance (if connected to Ethernet network). | Read-Only | N/A |
| MAC Address | MAC Address (Serial #) of the appliance. | Read-Only | N/A |
| Subnet Mask | Subnet mask of the appliance (if connected to Ethernet network). | Read-Only | N/A |
| Default Gateway | Default router IP address (if connected to Ethernet network). | Read-Only | N/A |
| Primary DNS | Displays the address of your Primary DNS. | Read-Only | N/A |
| Secondary DNS | Displays the address of your Secondary DNS. | Read-Only | N/A |
| Ethernet Link | Displays whether the device has a valid Ethernet connection. | Read-Only | Displays Yes or No |
| Ethernet Speed | Displays the current speed of the Ethernet connection. | Read-Only | N/A |
| Ethernet Duplex | Displays the current Ethernet mode. | Read-Only | Displays Full or Half |
| NTP Server | Displays the address of time server you are syncing with. | Read-Only | N/A |
| NTP Status | Displays whether or not the device is in sync with the NTP Server. | Read-Only | N/A |
| Proxy Server | Displays the address of your Proxy Server (if applicable). | Read-Only | N/A |
| EchoSystem Server Connection | Displays whether the device is connected to the EchoSystem Server. | Read-Only | Displays Connected or Disconnected |
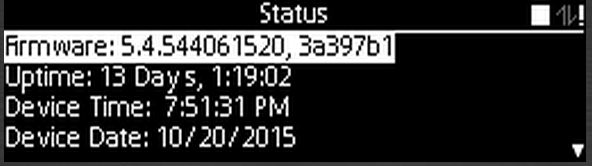
Status Menu
The Status Menu will display the status of the appliance itself.
| Sub Menu | Description | Selectable / Read-Only | Options |
|---|---|---|---|
| Firmware | Provides information on the device including firmware version number and OS version. | Read-Only | N/A |
| Uptime | Provides information on OS uptime (since the last reboot). | Read-Only | N/A |
| Device Time | Lists device time in Local Time. | Read-Only | N/A |
| Device Date | List device date in MM/DD/YYYY (US) or DD/MM/YYYY (UK) format. | Read-Only | N/A |
| Scheduled Recordings | Lists upcoming scheduled recordings. The information that will be displayed includes the date of recording in MM/DD/YYYY (US) or DD/MM/YYYY (UK) and title of recording. | Read-Only | N/A |
| Resources | Displays device resources including CPU Utilization, Fan speed, Temperature, Disk Storage Space Free and Disk Storage Space Available. | Read-Only | N/A |
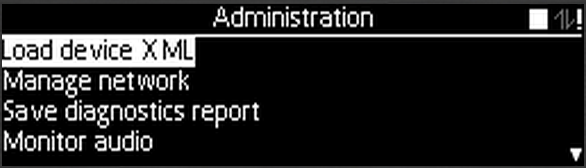
Administration Menu
The Administration Menu will display controls for the administration of the device.
Administration Menu
Please note that the Administration Menu is either accessible or not depending on the Device Configuration.
| Sub Menu | Description | Selectable / Read-Only | Options |
|---|---|---|---|
| Load Device XML | Initiates appliance to read device.xml via USB port. Provides real-time status on the reading/loading of the device.xml file. | Selectable | OK, Cancel |
| Manage Network | Ability to enter/set some of the information from the Network Menu. | Selectable | See Manage Network section below. |
| Save Diagnostics Report | Ability to download the device log to USB. | Selectable | OK, Cancel |
| Monitor Audio | Allows selection of the desired audio input type for the audio source as well as the volume. | Selectable | Select inputs, Adjust balanced and unbalanced volume, Cancel options. |
| Ping | Ability to ping the localhost, the gateway or a custom IP address. | Selectable | Alpha-numeric input and Ping, Cancel options. Note: Upon Ping, response will either be Connection Successful or Connection Failed |
| NS Lookup | Ability to obtain domain name or IP address mapping, or for any other specific DNS record. | Selectable | Alpha-numeric input and nslookup, Cancel options. |
| Traceroute | Enables the ability to run the traceroute command. | Selectable | Alpha-numeric input for traceroute address, Cancel options. |
| Recover Data | Ability to bulk recover all captures from the SSD to USB media (USB flash drive or mass storage device) | Selectable | Start Recovery, Cancel options. For more information, please see "Recover captures from SSD" in our How-to section. |
| Restart Device | Enables the ability to restart (soft reset) the device. | Selectable | OK, Cancel |
| Factory Reset Device | Hard reset of the device. | Selectable | Save Settings, Delete Settings, Cancel options. 'Save Settings' will retain any settings that had been applied via a device.xml file prior to doing the reset. 'Delete Settings' will remove any applied device.xml file during the reset. |
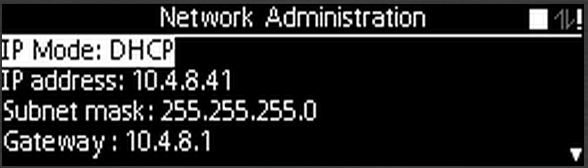
Manage Network
The Manage Network Menu allows an administrator or technician to configure the device.
| Sub Menu | Description | Selectable / Read-Only | Options |
|---|---|---|---|
| IP Mode | Displays whether the device is connected via DHCP IP address or Static IP Address. | Selectable | Static, DHCP, Cancel options. |
| IP Address | IP address of appliance (if connected to Ethernet network). | Selectable | Numeric input, Save, Cancel options. |
| Subnet Mask | Subnet mask of the appliance (if connected to Ethernet network). | Selectable | Numeric input, Save, Cancel options. |
| Default Gateway | Default router IP address (if connected to Ethernet network). | Selectable | Numeric input, Save, Cancel options. |
| Primary DNS | Displays the address of your Primary DNS. | Selectable | Numeric input, Save, Cancel options. |
| Secondary DNS | Displays the address of your Secondary DNS. | Selectable | Numeric input, Save, Cancel options. |
| Renew DHCP | Enables the ability to renew the DHCP IP address (if applicable) | Selectable | OK, Cancel |
Device Messages
The PRO will display the following messages in specific situations. These messages will be displayed across Section 2 of the Status Screen. If the need arises to contact Technical Support, please provide the code number, E1 through E12, as seen in the upper right-hand corner (Section 3) of the Status Screen when opening a support ticket.
| Message Displayed | What to do |
|---|---|
| Oops! Something's wrong. | Please run and save the built-in diagnostic report and send that information to Technical Support in order to open a support ticket. |
| Oops! Something's wrong. Hold on while I fix it. | Wait at least 5 minutes, to give the device time to recover. If this message is still displayed after that time, power cycle the device. If the power cycle fails, then try device reset. If the device is still not functioning properly, please contact Technical Support. |
| Oops! Something's wrong. I need help. Please perform a factory reset. | Please perform a device reset. Since a device reset will automatically erase all content currently being stored on the device we ask you, the user, perform the device reset (rather than having the device reset itself) so you can recover any content from the SSD that you'd like to keep (prior to performing the reset). |
| This disk appears to be empty. Hold on while I set it up. | Even though this is an Error code, it's not necessarily an error message. It is perfectly normal to see this message while setting up the device. |
| Oops! Something's wrong. My disk is missing. Contact Echo360 support. | Try to power cycle the device just in case, but more than likely this will result in an RMA. Please contact Technical Support. |
"Hold on while I fix it"
Please note that if you're upgrading a device and a message is displayed on boot-up that includes, "Hold on while I fix it", the device could revert to a previous disk image. If there is no previous disk image, the device will reboot in recovery mode.