Security Modules
- Hannah Petty
In this section:
Overview
You can implement any of four different types of security:
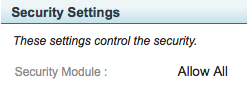
Allow All, the default security module, requires no authentication.
Authentication Required allows you to authenticate users against the user profile information on the ESS or against a configured Trusted System such as CAS or Shibboleth or other third-party system.
LDAP integrates the ESS with an existing LDAP security system. See LDAP Authentication for additional information and instructions. If necessary, you may want to refer to this KB (Knowledge Base) article (LDAP security module configuration) for details on configuring the ESS for LDAP.
Seamless Only provides the ability for a trusted system, such as an LMS, to perform authentication and authorization for ESS content links. This allows a user to seamlessly log in to content hosted by ESS from publishers such as Blackboard and Moodle.
If you are using LTI-Based Publishing, you MUST use either Seamless Only or Authentication Required as the security module for user authorization.
If you are using Seamless Only to provide access through an LMS or other third-party system, users can only access Echoes through that system, and only if you have installed the building block or plug-in that provides seamless authentication into an EchoSystem. Echo360 provides downloads for supported systems via the Customer Portal.
Seamless Only vs Authentication Required
If Seamless Only is used on a section, then students must be authorized via an LTI or Seamless link for the specific section in the LMS in order to view content for that section.
If Authentication Required is used on a section, then any authenticated student can access the content for that section.
If You Are Creating an LDAP Security Module
If You Are Creating a Seamless Only Security Module
In certain specific circumstances, the Seamless Only security module can prevent users from logging in to an EchoCenter page. This happens when the section associated with the EchoCenter page has the Seamless Only security module specified and one of the following is true:
- System Missing. You have not configured a trusted system.
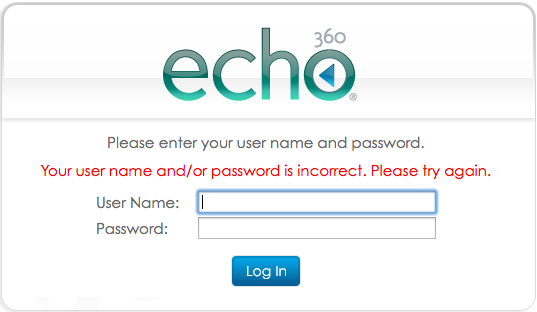
- User Not Authenticated. The user logs in to the EchoCenter page without first logging in to a trusted system, such as an LMS like Blackboard or Moodle.
Because the user has not been authenticated, the EchoCenter does not allow access. The user is told that the user name or password is incorrect, as shown below.
To prevent the System Missing case from occurring, make sure you configure a trusted system if you configure a Seamless Only security module. See Trusted Systems.
To address the User Not Authenticated case, follow these practices:
- If your security system is configured in a way that makes this case likely to occur, use a different security method, such as LDAP, CAS, or Shibboleth. All of these methods support seamless login. This means that once the user has logged in, he can access the EchoCenter without being challenged for credentials.
- If you want to use the Seamless Only security method, prepare your school's Help Desk to aid users:
- Explain how the User Not Authenticated case occurs.
- Explain this quick fix: If a user is unable to log in to an EchoCenter page, have the user log in to a trusted system, such as a learning management system (LMS) first. Logging in to the LMS authenticates the user, who can then log in to the EchoCenter page.
Create the Security Module
Follow these steps to create the security module.
- Log in as an Administrator.
- Navigate to the System > Security page of the ESS.
- Click the Add button. The Add Security Module page appears as shown in the figure below.

Enter a Name for the module, preferably using one that indicates its function, such as "ldap_content_module".
Enter a Description of the module. This appears in the Security Modules list on the ESS.
- Select the parent or child organization from the Organization list.
- Select the module type from the drop-down list. Depending on your selection, the page expands to show additional fields.
- If you want this security module to be inherited by all new sections by default, select the Default Module? box. There can be only one Default Module. If you have already configured a Default security module, this field shows "No" as the value with no checkbox.
- If you are configuring an LDAP security module, complete the Security Settings - Tree 1 fields, using the input data from the LDAP Administrator. See If You Are Creating an LDAP Security Module.
- Click Save.
Delete the Security Module
You can only delete custom security modules. You cannot delete the Allow All, Authentication Required, LDAP, or Seamless Only security modules.
When you delete a custom security module, you must specify the alternate security module to use. If the custom security module is specific to a certain child organization, the alternate security module must be:
- Associated with the same child organization, or
- Associated with the parent organization
Upon deletion, when a replacement security module is chosen, any applicable properties of the deleted security module should be copied over to the replacement security module.
If you do not specify an alternate module, the Allow All security module will be applied to sections that were associated with the deleted security module.
Best Practice: Know the Alternate Security Module You Will Apply
Before deleting a custom security module, review the sections that will be affected and determine which security module you want to apply to those sections.
Procedure
- Navigate to System > Security.
- Click on the security module you want to delete.
- On the Security Module Details page, scroll to the bottom.
- Click Delete.

- Specify the alternate security module to use.
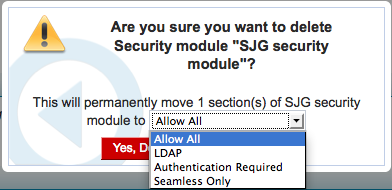
- Confirm the deletion.
- Notice that the security module has been removed from the security module list.
- Check that the new security module was assigned.
- Navigate to a section that had the deleted security module assigned
- Notice that the section now has the alternate security module assigned.