Add a User
In this section:
Overview
This procedure explains how to add a single user through the user interface. You can also add many users all at once (or change their attributes) using the import/export method.
If the User is an Instructor
You may be adding a user as an Academic Staff Member, whom you will assign to specific sections later.
Procedure
- Navigate to Configuration > Users.
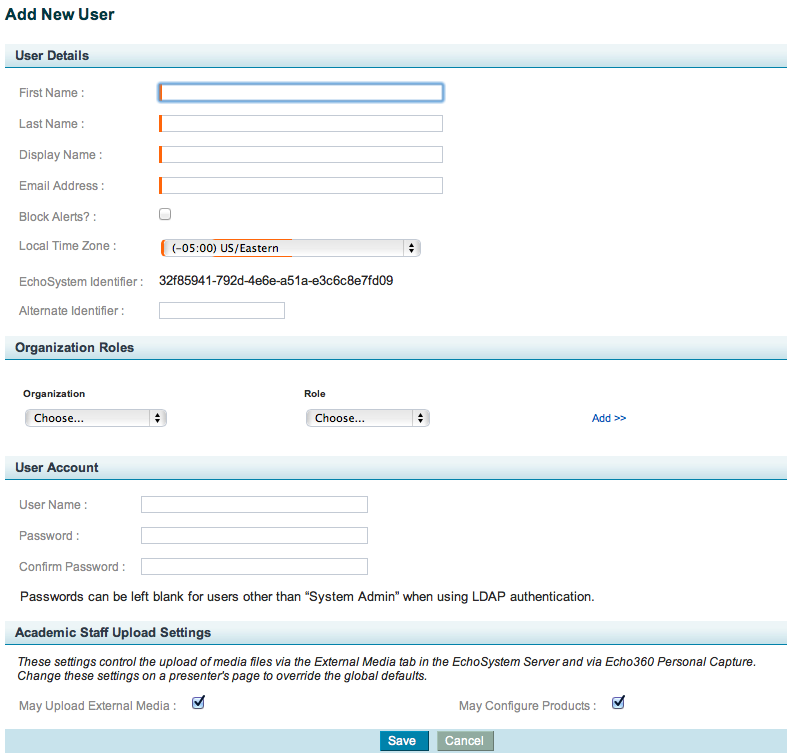
- Click Add. The Add New User screen appears, as shown in the figure below.
Complete the form by filling in the fields with the necessary information. The table below describes each field.
Field Description First Name & Last Name The First and Last Names for the user. Display Name Enter the name that should appear in the system, such as on Echoes or in Discussion logs for the user. Can be different than the name entered elsewhere on the form. For example, the user's name might be Larry Uffelman but his Display Name should appear as Dr. L. Uffelman. Email Address Email address for the user. This field is required. Block Alerts? Use the checkbox to determine if the user should receive monitor alerts to the email address provided. Check the box to block alerts. Local Time Zone Select the local time zone from the drop-down list. EchoSystem Identifier Unknown macro: {multi-excerpt-include}Alternate Identifier Unknown macro: {multi-excerpt-include}Organization & Role If you are creating a Student User, skip these fields. Students are identified by the system as "users without a defined role or organization".
For all other users you must complete this section. Assign Organization and Role as follows:
- Select the Organization to which this user belongs.
- Select a Role for the user. Your options are shown in the below figure.
- Then click Add.
- Repeat these actions to assign the user to a different role in the same organization, or to a role in a different organization.
User Name Enter the account User Name for this user. This is what the user will enter when logging into the system and must uniquely identify the user. Password & Confirm Password Enter a password and confirm the password for the Username provided. This is NOT required for users other than System Administrators if you are using LDAP for authentication. System Administrators MUST have a username and password even if using LDAP authentication. May Upload External Media Check this box to allow this user to upload external media to the system such as media files to support a class or a Personal Capture recording. NOTE: Personal Capture still requires a license to upload recordings, in addition to having this option checked for the user. May Configure Products Check this box to allow this user to configure uploaded media, such as editing echoes or other media files uploaded to the system. - When finished, click Save.
Verify that the user was added properly by checking the different tabs in the Users page on the ESS, shown in the below figure.
- If you created a non-Student user, the new user is listed in the Active Staff tab.
- If you created an Active Student user, the new user is listed in the Active Students tab.


