Server Configuration for Ad Hoc Capture
- Hannah Petty
In this section:
Overview
All venues (rooms) must have a capture device, such as a capture appliance or Classroom Capture that is properly licensed in order to perform ad hoc captures. See License Venues.
Automated Ad Hoc Capture
The automated ad hoc capture workflow is driven by the association of Academic Staff members to sections. This association is done in the ESS UI. These steps assume you have created sections and Academic Staff.
The Academic Staff member must have a section assignment to run automated ad hoc captures. There are also several other settings applied to sections to drive the ESS processing and publishing automation. This section is specific to Academic Staff member and section assignment. For details on the other settings, see Manage Sections.
- In the ESS UI, navigate to Configuration > Schedule.
- Click the Course containing the section to assign.
- Edit the desired Section.
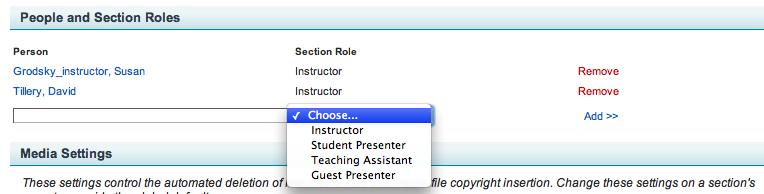
- In the People and Section Roles portion of the page, shown in the below figure, use the Person and Section Role drop-down lists to assign an Academic Staff member to the section, along with their role. Section Role choices include:
- Instructor
Student Presenter
- Teaching Assistant
- Guest Presenter
- Click Add, located to the right of your selections.
- When finished, save the changes.
Basic Ad Hoc Capture
To run a basic ad hoc capture, use the generic user name and password to log in to the capture device via the ESS UI. The generic user is a shared log in to the capture device.
To specify the authentication settings for all capture devices:
- Navigate to System > Device Defaults.
- Click Edit.
- In the Local Web User Interface section, set the Generic User Name/Password. You can now use this information to log in to any capture device in any venue.
You can override this user name and password for a capture device in a single room as follows.
- Navigate to Configuration > Rooms.
- Click the edit button in the row corresponding with the room you want to edit. The Edit Room page appears.
- In the Local Web User Interface section for the capture device type(s) you have licensed, edit the Generic User Name/Password.