Server Configuration for Presenters
In this section:
Overview
You typically assign the Academic Staff role to faculty, then apply one of the section roles to the faculty member when you add the faculty member's sections. Doing so allows Academic Staff to publish Personal Capture recordings and import external media (Media Import) for those sections.
In order to use PCAP and publish those recordings, Academic Staff must be licensed to use Personal Capture. Personal Capture users are also referred to as "Presenters".
Add a Presenter
Before you can make a person a Presenter, you must add them to EchoSystem as an Academic Staff user. You then give that Academic Staff user a Presenter role when you add their section. Presenter roles include Instructor, Student Presenter, Teaching Assistant, and Guest Presenter.
For licensing purposes, users only need to have the Academic Staff role assigned to their user account. They do not need to be a Presenter for a section or schedule in order to be licensed, however they do need to be associated with a section in order to publish recordings to a section. The licensing interface, however, refers to licensed users as "Presenters."
License Presenters
If you are licensing Presenters for Personal Capture, there are two options: site license or license packs. If you purchased a:
- Site license, no further licensing configuration is required. Presenters are automatically granted the ability to capture and publish.
- License pack, you must assign licenses to Presenters who will use Personal Capture.
There are four ways to assign licenses to presenters.
- Navigate to System > Licensing where you can:
- Navigate to Configuration > Userswhere you can:
Assign Presenters to Sections
To publish Personal Capture recordings or to import external media for a section, the Presenter must be assigned to the section with a section role, or assigned as a Presenter on a schedule for a section.
- On the EchoSystem Server (ESS), navigate to Schedule > Courses.
- Click on the course that contains the section to be assigned.
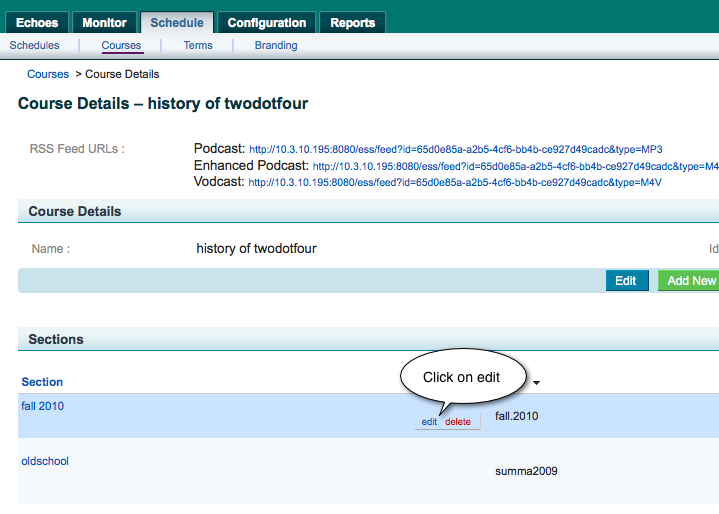
- On the Course Details page, click on the edit button for the Presenter's section, as shown in the figure below.
- In the People and Section Roles portion of the Edit Section page, shown in the below figure, select an Academic Staff member from the Person drop-down list, then select a Role for the user from the Section Roles drop-down list.
- Click the Add >> link located to the right of your selection.
- Save the changes. The user is now assigned a role for the section.
Assign Presenters to Schedules
When you create a schedule for a section, you have the ability to assign a Presenter to that particular section schedule. This simply identifies who is typically presenting that particular instance of the section.
Presenters for schedules are not required to be the same people assigned section soles for the section, though typically they are. You may, for instance, have a one-time special event for a section where there is a Guest Presenter who is not necessarily assigned to that section.
The assignment of Presenter for a section schedule allows that user to upload media and Personal Capture recordings (if the user is licensed to use Personal Capture) to the ESS for that section. Presenters can be added when you create the schedule, or added later by editing an existing schedule, using the procedure below.
- On the ESS, navigate to Schedule > Schedules.
- From the list, find the section schedule to which you want to add a Presenter, and click Edit, as shown in the figure below.
- In the Presenters section of the Schedule Details screen shown in the below figure, select a Presenter from the drop-down list, then click Add >>. As is indicated below the text box, you can shorten the selection list by entering partial First Name, Last Name, and/or Email Address text into the Presenter box.
- Repeat this step to add more Presenters to the schedule.
- When finished, click Save.


