Manage Existing Schedules
- Hannah Petty
In this section:
Overview
After you have created a few schedules you may want to:
- Sort schedules by title, presenter, room or status
- Filter and search schedules
- Copy a schedule
- Delete draft or completed schedules
All of these tasks are done from the Schedules tab. Select Schedule > Schedules.
Sort Schedules
The Schedules List view organizes schedules into active, draft, and completed groups by tabs. Within each tab, schedules are listed in a table with sortable columns. You can sort schedules by various parameters, such as title or presenter. The figure below shows the Active tab of the Schedules List view.

Some schedules have additional management options. Hover your cursor on the schedule row to make the hover menu appear.
Filter and Search Schedules
Use the Filter By and Keyword Search controls to display only the schedules of interest. The filter or search is specific to the selected tab. This means that if, for example, you are viewing the Active schedules and search for the course "ECON101", only schedules in the Active tab with that keyword will be displayed. To apply a filter to all schedules with a particular keyword or parameter value, select the All tab.
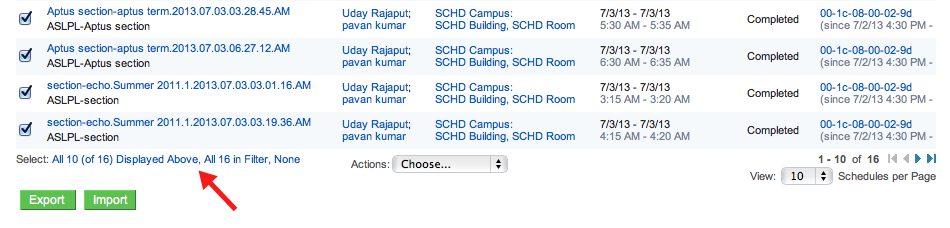
This is particularly useful for applying a batch action, such as deleting schedules, to a set of schedules. Use the filter to narrow the list, then sort the filtered list to show the schedules you want. You can then use the selection links, shown in the below figure, to select all or some subset of the listed schedules for deletion.
Copy a Schedule
Copying a schedule is a convenient time-saver when a section's schedule is the same for two terms.
You can copy active schedules only. When you copy a schedule, the section and schedule data are copied into a new term.
- Create a new term (Schedule > Terms). You will copy the section and schedule into this new term.
- Set this term to be the default Term (Configuration > Organizations).
- Navigate to Schedule > Schedules. Find the schedule you want to copy, using a filter or keyword search as necessary.
- Hover your mouse over the schedule you want to copy. Notice that a copy button appears below the schedule name, as shown in the figure below.

- Click Copy.
- The edit schedule page displays. Edit the schedule data if necessary.
- Scroll to the bottom of the page and click Save.
- The schedule is saved as a draft.
- Notice that the new term ("Spring" for example) appears next to the course name and title.
- Click Activate.
Delete Schedules
You can delete draft, completed and active schedules. You can delete an active schedule even if the end date of the schedule is later than the current day's date. Say, for example, that today is Friday, June 7, 2013 and you want to delete a schedule with an end date of July 7, 2013. You can delete that schedule. You do not need to change the end date in order to delete it.
When you delete a schedule, no other objects are deleted with it.
- Navigate to Schedule > Schedules.
- Select the tab containing the schedule(s) you want to delete.
- Do one of the following:
- To delete a single schedule, click the name of the schedule to open the Schedule Details page, then click Delete.
- To permanently delete one or multiple schedules, select the box to the left of each schedule and select Delete selected from the Actions drop-down list at the bottom of the page.
- Confirm that you want to delete the schedule (s).
- Notice the confirmation message at the top of the page.
- Refresh the page. Notice that:
- The schedule is deleted from the list
- The number of schedules listed for the tab is smaller
Manage Schedules with Default Presenter as Instructor
In certain cases, you will see the Default Presenter assigned to a schedule:
![]()
This occurs when you have retired the only Presenter assigned to the schedule (typically an instructor assigned to the associated section). When this happens, the Default Presenter (not a real person) is automatically to the schedule, because the schedule requires a Presenter be assigned.
When an Instructor takes responsibility for teaching a section assigned to the Default Presenter, change the presenter assigned to the section and schedule. You can update schedules in either of two ways:
- By importing from a spreadsheet . If you have many schedules to modify, use this method. See Import and Export Objects and Import Schedules.
- Via the user interface. If you have only a few schedules to modify, this is the easiest way.
The steps below provide guidance on how to identify and edit schedules associated with a Default Presenter. You should also identify and edit any sections associated with a Default Presenter as soon as you can assign Academic Staff to the section. See the People and Roles section of the Manage Sections page for additional information.
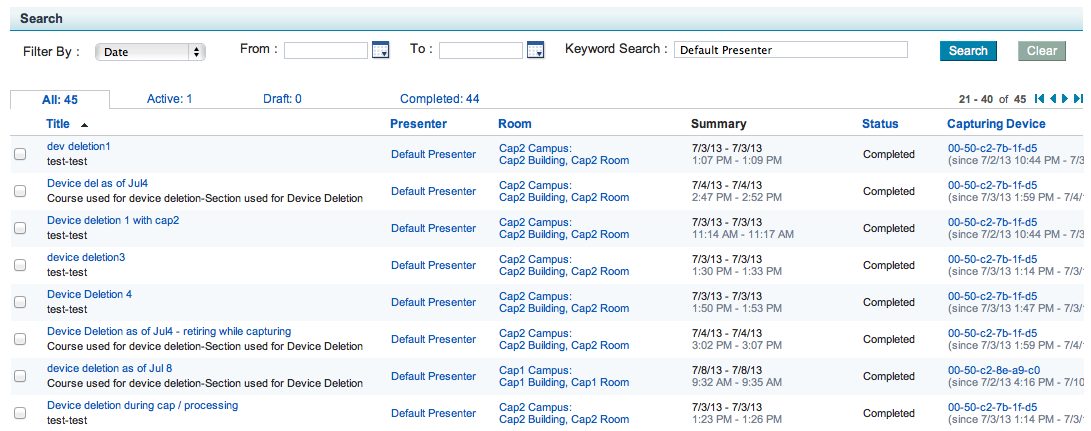
- Navigate to Schedules > Schedules.
- In the Keyword Search field, enter default presenter.
- Review the list of schedules assigned to the Default Presenter and decide how you will edit the schedules.
- Hover over the schedule and click edit.
- Remove the Default Presenter
If you have a lot of schedules to modify, prepare and import a spreadsheet. See Import Schedules. If you have only a few schedules to modify, edit each schedule.- Hover over the schedule and click edit.
- Remove the Default Presenter
- Add the new Instructor or Presenter.

Be sure you also to modify the sections to reflect the change in Instructors from Default Presenter.